• Sewing Patterns
  • Blog
  • About
  • Contact
  • Sign In My Account
Menu

RLR Creations

Fun to Sew Bag Patterns with Every Skill Level in Mind
  • Sewing Patterns
  • Blog
  • About
  • Contact
  • Sign In My Account
Cover.jpg

Installing Screw-in Grommets

March 7, 2018

There are a variety of  helpful tools available for cutting holes for grommets , such as leather hole punches like these: 

00.jpg
0.jpg

They make the job easier by simply selecting the correct punch for the size hole you need and hitting with a hammer. However I have found that when needing to go through several layers of fabrics and interfacings they won't punch through. Or, some cases you simply don't have the right size for the hole you need to cut. BUT it's super easy to just cut your holes without them  to get the perfect size hole for your grommet everytime. 

There are many methods (tips and tricks) for cutting holes in your finished bag and installing grommets. So, this is not the right way or the only way but here is how I install them.

Let's get started!

1. Mark your placement according to the pattern instructions. Take the screws out of the grommet and separate the pieces.

 
1.jpg
 
2.jpg


2. Put the screws aside in a safe place so you don’t lose them!


3.jpg

3. Take the back plate (the flat one) and place it on your fabric at your placement markings and trace around the inside opening and then around the outside parimeter.


4.jpg


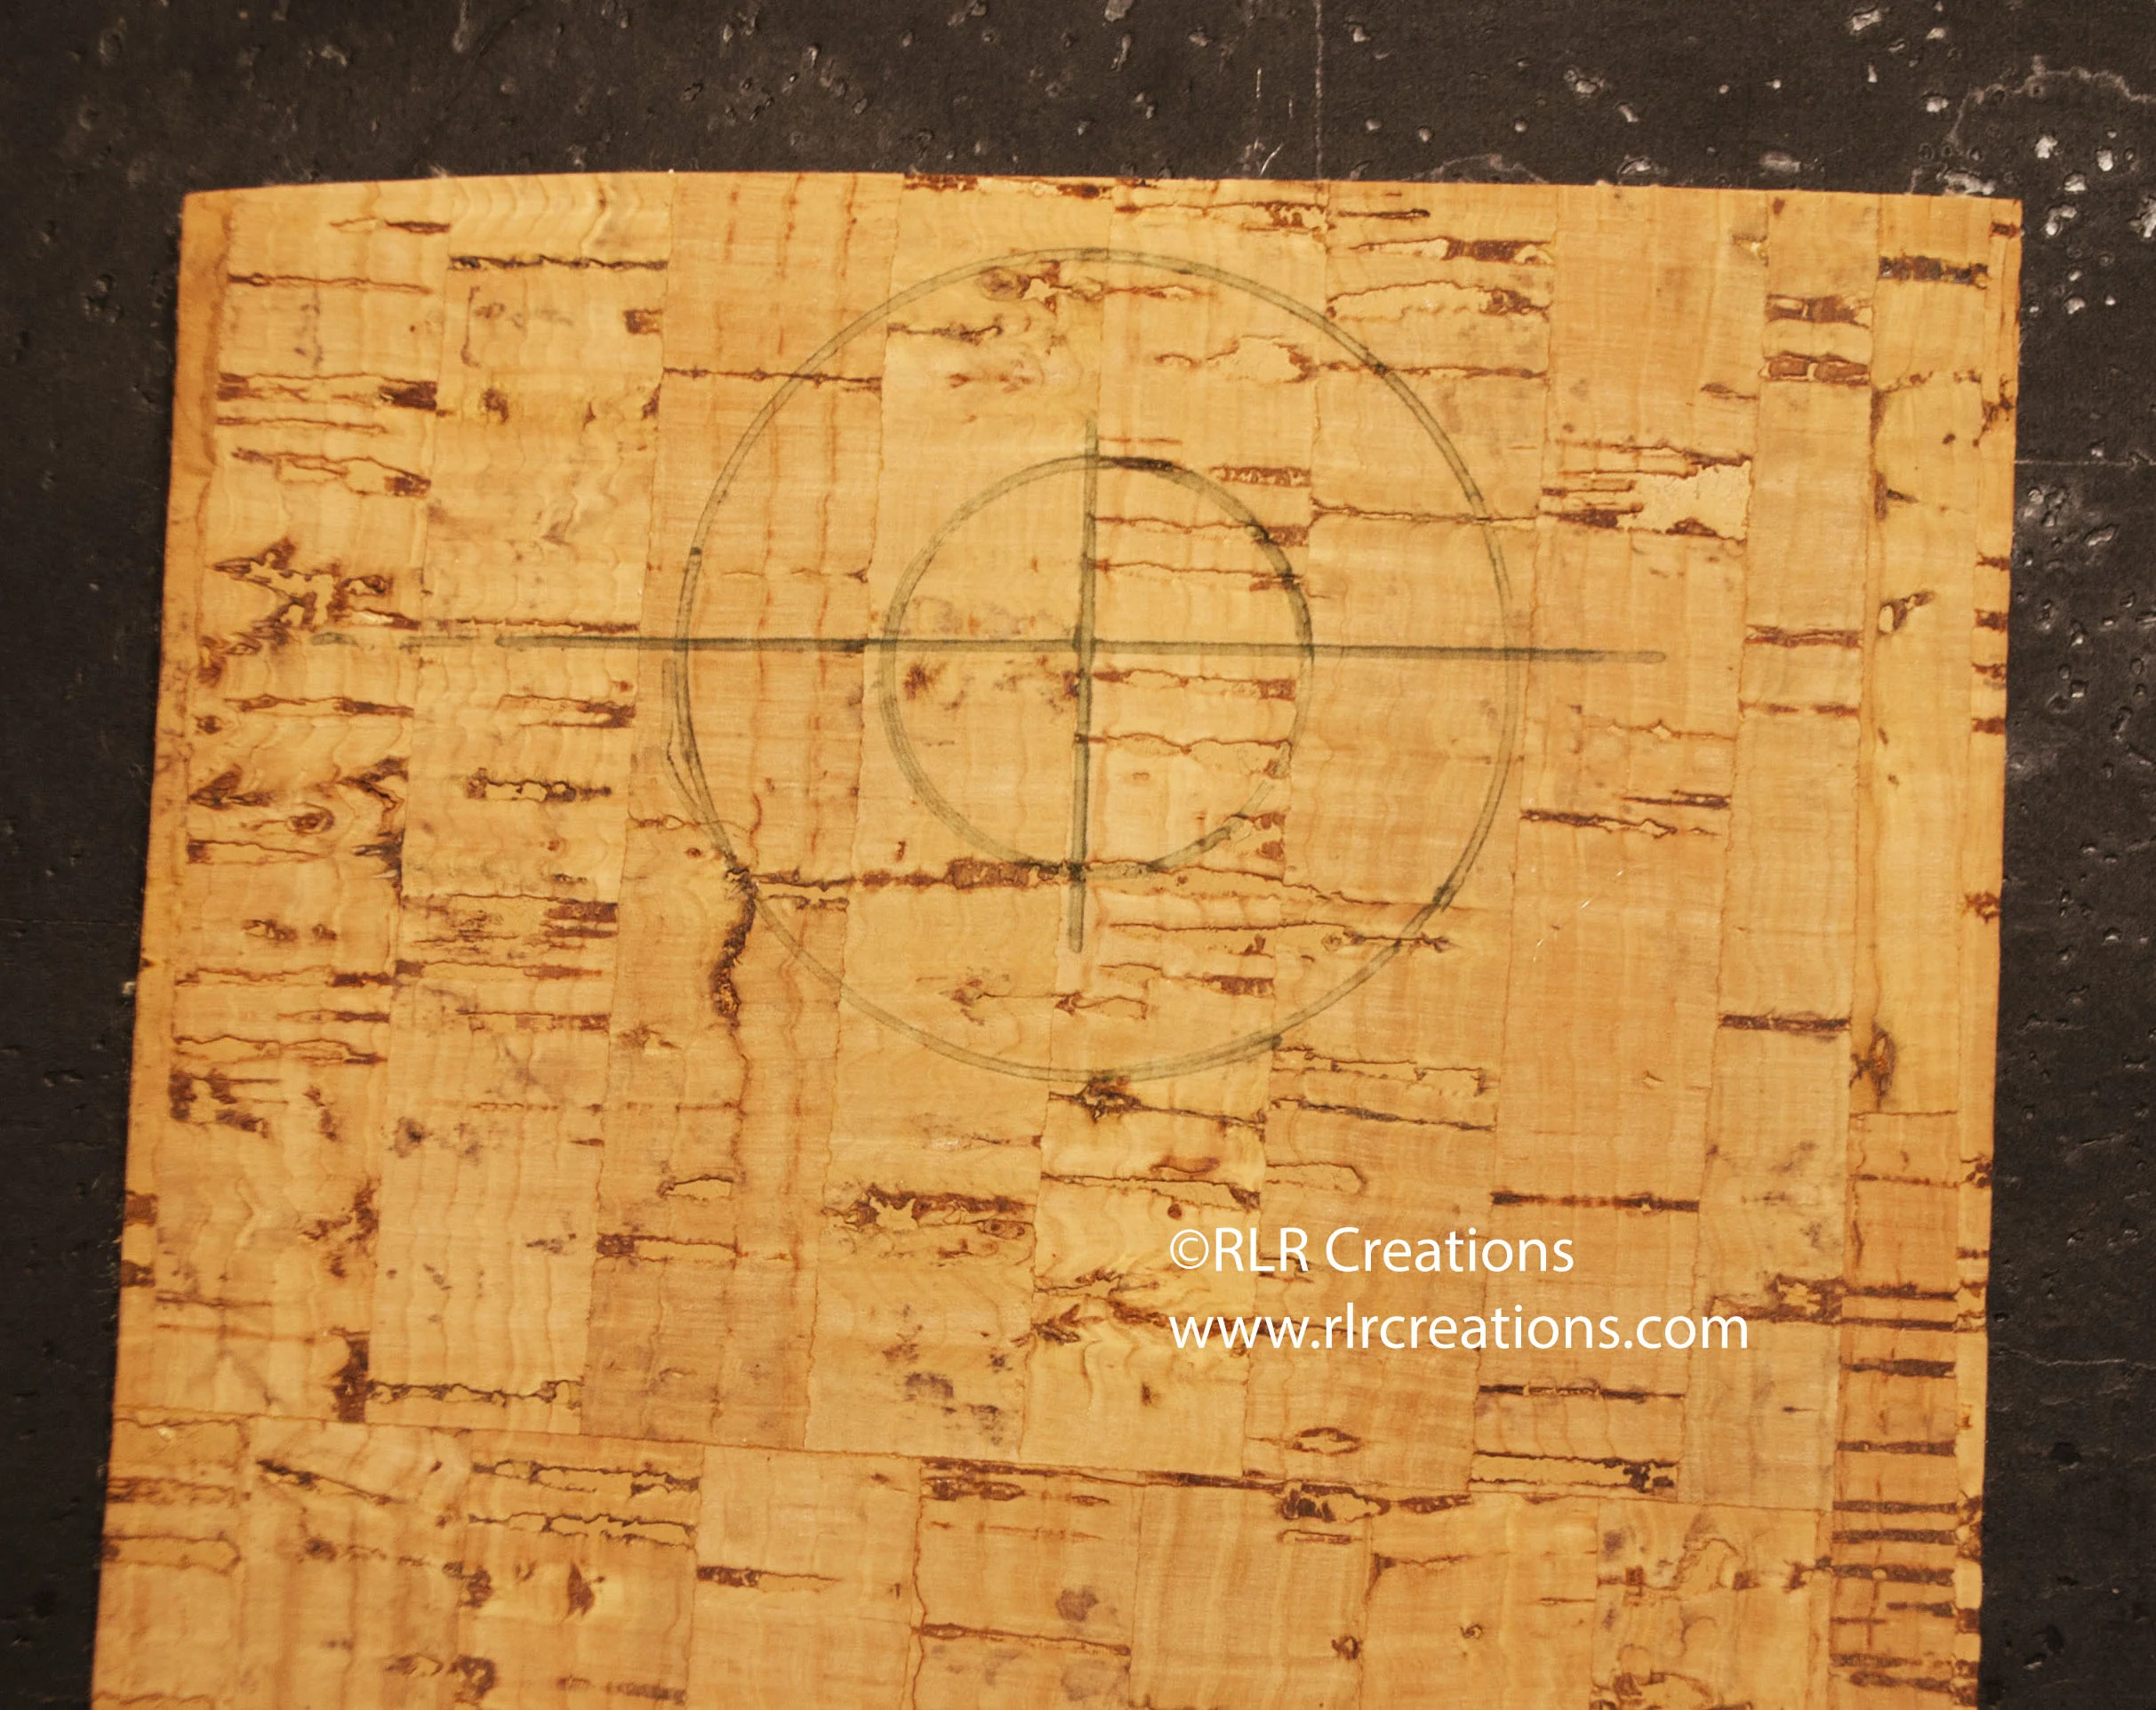
This will help you know where your hole needs to be cut to fit within the grommet. You need it slightly larger than the inner opening but smaller than the overall grommet size.


4. After you have your grommet traced draw a vertical and horizonal line inside the center circle. This will aid you in getting your hole cut.


5. You will need a pen knife and a pointy pair of sharp scissors.

5a.jpg

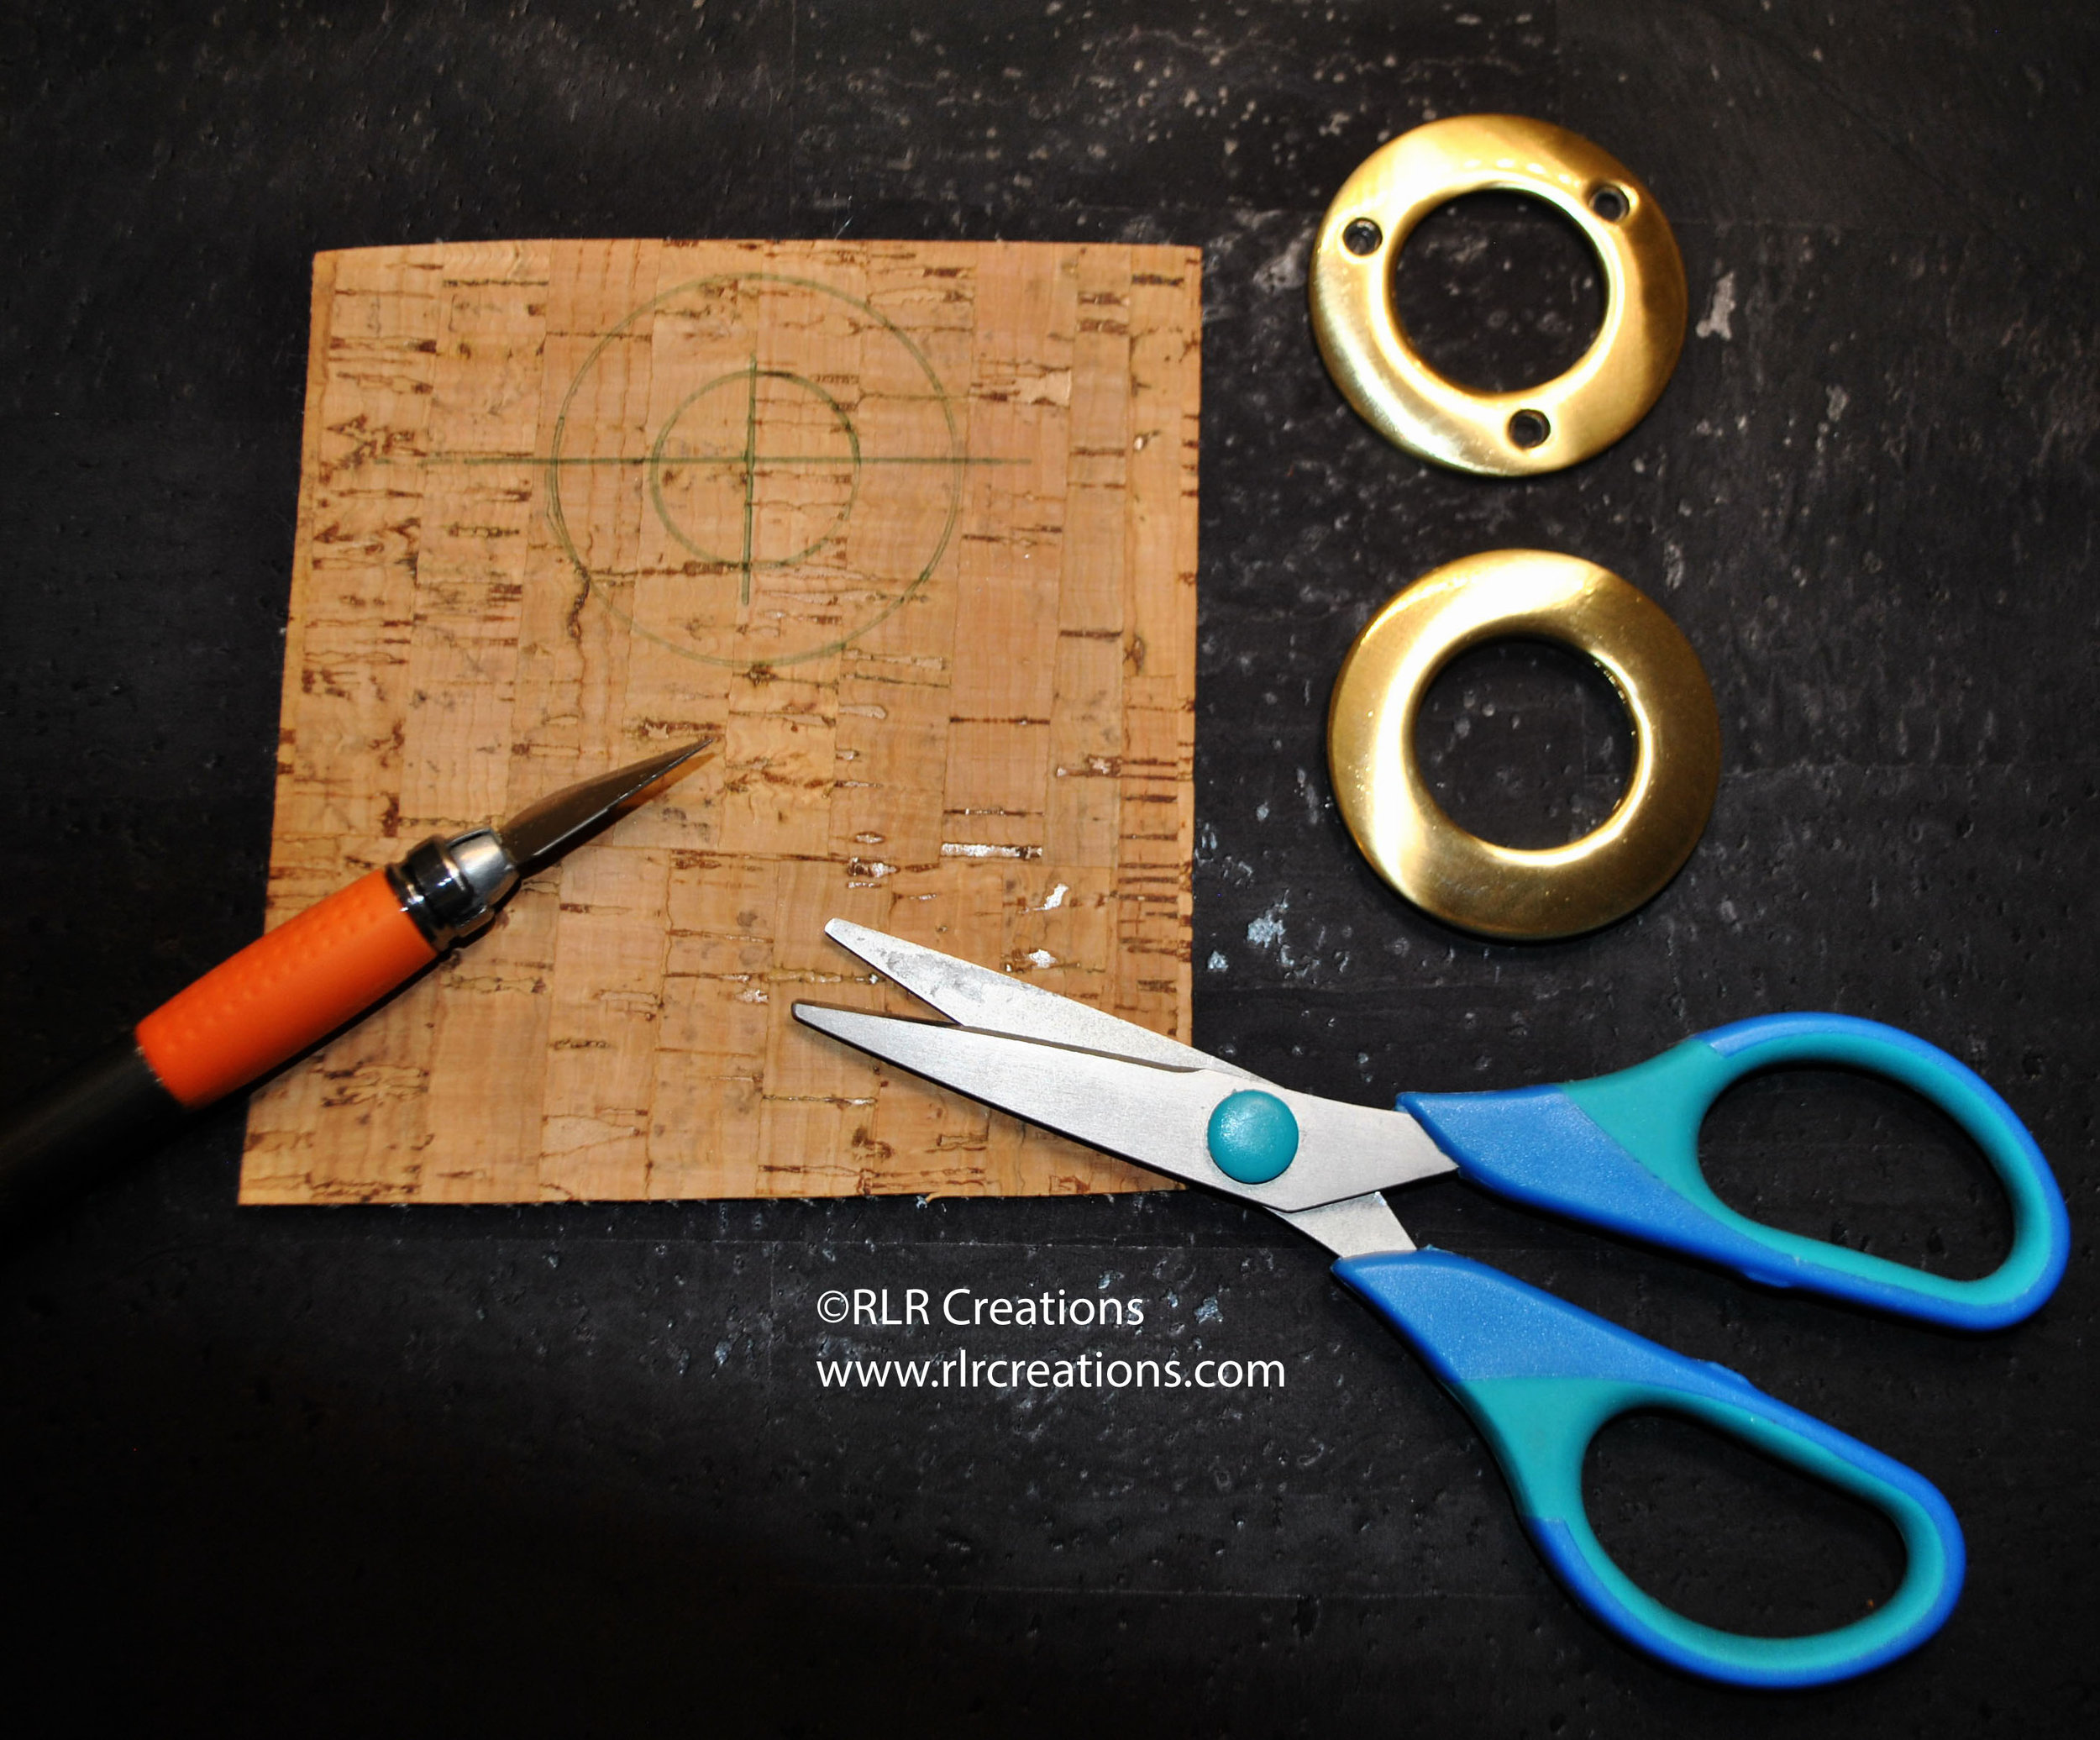
Use the knife to cut across both lines you drew going just past the inner circle. This will help you get the circle cut easier. Next, using your small scissors cut the arc between each straight line on all four sections to create a full circle cut.

6.jpg
7.jpg

Your circle cut out does not need to be perfect it just needs to be bigger than the inner circle but does not exceed the outer one.

 
8.jpg
 

6. Once you got an opening cut it is ideal to use some glue between the layers so that if you need to further cut your hole, and to keep the lighter layers from pulling out of the grommet after installed, lift the very top layer on the interior side up and run a line of glue between the layers, and then do the same on the exterior layers.

9.jpg

7. Lay one of your grommet pieces over the hole you just made to be sure that it is large enough not to show any fabric around the inner circle.  If need be trim the circle again so you will not see any fabric or interfacings within the grommet hole when installed. It’s much easier to cut the layers now that you have them glued together!

10.jpg

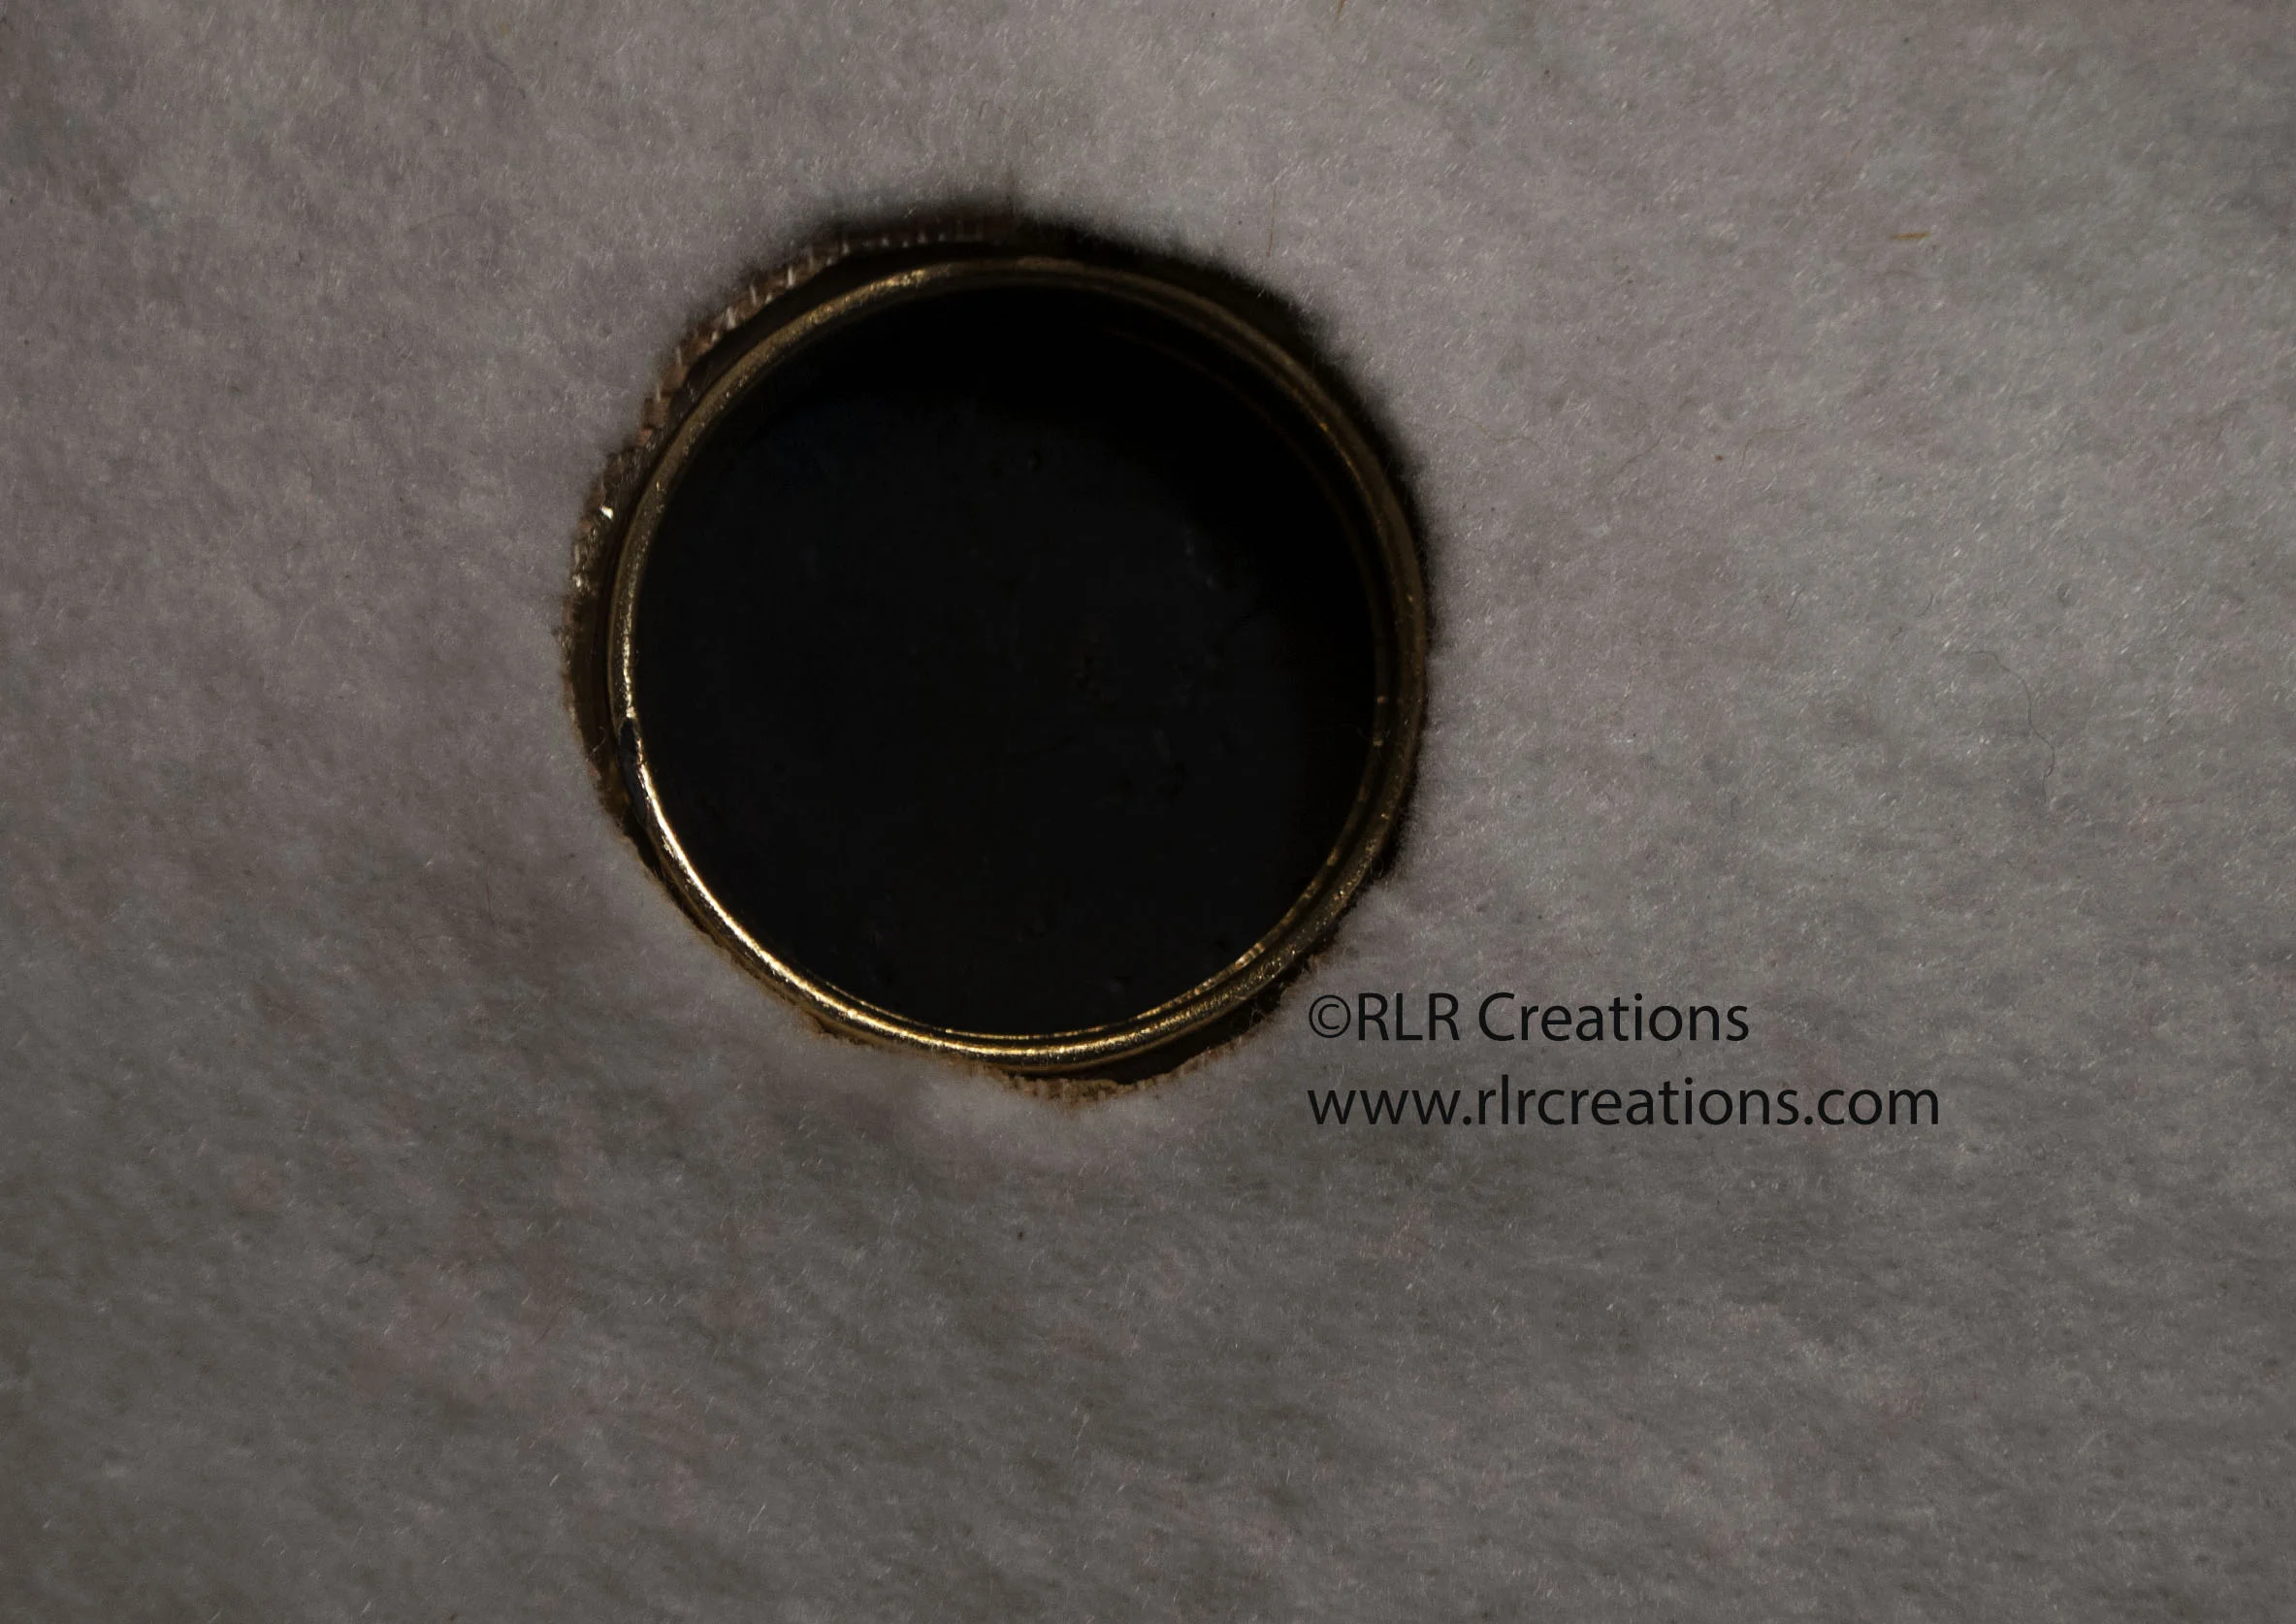
8. Once you are satisfied with your opening check once more to be sure that your grommet will align at the placement position.

11.jpg

The most common problem in installing screw in grommets is getting those little screws in! The screws that come with them are not pointy or sharp enough to go through layers of fabric. Thus, you can create holes for the screws to go into.

I don’t like to cut notches at the holes, nor stretch the fabric to expose the holes as either of these can later lead to the fabric pulling out between the layers of the grommet pieces.

This is how I do it:

9. With the grommet in the correct position take a fine sharpie and place it in each screw hole to mark their position.

13.jpg
Once you remove the grommet piece you will be able to see the dots that will be the position of the screw holes.

Once you remove the grommet piece you will be able to see the dots that will be the position of the screw holes.

10. Take an awl and hammer and punch each mark to create a hole. This will assure that your screws will tighten properly and get though all the layers.

15.jpg

11. Align the front piece of your grommet with in the circle hole you cut and place a drop of glue in each screw hole.

16.jpg

12. Place the back piece of the grommet on top of the fabric aligning the holes with the front piece. Again, you can use your awl to be sure both pieces of the grommet align with the holes you made through the fabric layers.

17.jpg

13. Now just add your screws and your grommet is installed!

18.jpg
19.jpg
20.jpg

Easy Peasy right?


For a wide variety of Screw-in grommets in a wide range of finishes, styles, and sizes check out the selection available at So, You need Hardware here: http://soyouneedhardware.com/grommets/

 
21.jpg
 

Ready to try installing your own screw-in Grommets? Be sure to check out the new pattern release - The Octavia Daily Tote coming March 8th!

1.jpg
← The Gidi diaper Clutch becomes a Sewing Clutch!!How to make a Card/Cash Front Pocket for the Zelie Clutch →

Archive

  • December 2022
    • Dec 1, 2022 Michael Miller Christmas Blog Hop Dec 1, 2022
  • October 2022
    • Oct 1, 2022 Slow Stitching with Michael Miller Fabrics- 2022 Harvest and Fall Blog Hop! Oct 1, 2022
  • November 2021
    • Nov 28, 2021 Holiday Nesting Band Boxes- "Making it fun" with Michael Miller Fabrics and A Quilting the Fabrics Tutorial Nov 28, 2021
  • January 2020
    • Jan 6, 2020 RLR Creations is coming back to Weatherford Texas for another Bag Making Retreat! Jan 6, 2020
  • June 2019
    • Jun 20, 2019 RLR creations will be hosting a bag making retreat in Clarkrange Tennessee Jun 20, 2019
  • April 2019
    • Apr 1, 2019 RLR Creations will be hosting another fun weekend for fellow bag makers August 16-19th, 2019 at the Historic Hotel Millersburg, Ohio Apr 1, 2019
  • January 2019
    • Jan 13, 2019 RLR Creations will be back in Texas for another Bag Making Retreat! Jan 13, 2019
    • Jan 1, 2019 RLR Creations Ohio Bag Retreat March 2019 Jan 1, 2019
  • July 2018
    • Jul 18, 2018 RLR Creations Texas Bag Retreat October 2018 Jul 18, 2018
  • April 2018
    • Apr 3, 2018 The Gidi diaper Clutch becomes a Sewing Clutch!! Apr 3, 2018
  • March 2018
    • Mar 7, 2018 Installing Screw-in Grommets Mar 7, 2018
  • February 2018
    • Feb 4, 2018 How to make a Card/Cash Front Pocket for the Zelie Clutch Feb 4, 2018
  • October 2017
    • Oct 14, 2017 Final Assembly of the Teardrop Sport- No Drop-in-Lining or Bias BINDING seams Assembly Method. Oct 14, 2017
  • May 2017
    • May 6, 2017 Laser Cut Acrylic Templates for RLR Creations patterns now availible from Tops and Bobbins May 6, 2017
  • March 2017
    • Mar 22, 2017 PATTERN SPOTLIGHT- THE TITANIA TOTE PATTERN FEATURE part 2 Mar 22, 2017
    • Mar 17, 2017 Give us your best view of the Titania Tote and win some fabulous prizes! Mar 17, 2017
    • Mar 15, 2017 PATTERN SPOTLIGHT- THE TITANIA TOTE PATTERN FEATURE Mar 15, 2017
  • February 2017
    • Feb 6, 2017 PATTERN SPOTLIGHT- THE LIMELIGHT ACCORDIAN WALLET FEATURE PART 3 Feb 6, 2017
  • January 2017
    • Jan 25, 2017 PATTERN SPOTLIGHT- THE LIMELIGHT ACCORDIAN WALLET FEATURE PART 2 Jan 25, 2017
    • Jan 17, 2017 Pattern Spotlight- The Limelight Accordian Wallet Feature Part 1 Jan 17, 2017
  • May 2016
    • May 3, 2016 How to turn Andrea's Rucksack into a Convertible Sling Bag May 3, 2016
  • March 2016
    • Mar 22, 2016 The New Titania Tote Pattern has been released. Mar 22, 2016
    • Mar 11, 2016 How to add a Zipper Closure to the Everyday City Tote Mar 11, 2016
    • Mar 6, 2016 Have you ever thought of being a Pattern Tester? Mar 6, 2016
  • February 2016
    • Feb 27, 2016 The Koala Handbag with a Detachable Clutch pattern has been published. Feb 27, 2016
    • Feb 18, 2016 How to finish a bag with a Drop-In style Lining Feb 18, 2016
  • January 2016
    • Jan 21, 2016 The Go Green Reusable Bags and Pod-- Tips for working with Ripstop Nylon. Jan 21, 2016
  • April 2015
    • Apr 1, 2015 Come join in the fun! Parisian Street Tote Swap and 25% off Pattern Apr 1, 2015
  • March 2015
    • Mar 15, 2015 PATTERN TESTING CALL- PARISIAN STREET TOTE Mar 15, 2015
    • Mar 9, 2015 The City Tote Pattern Release Notice Mar 9, 2015
  • February 2015
    • Feb 10, 2015 The City Tote Materials List Revealed Feb 10, 2015
    • Feb 8, 2015 Call for Pattern Testers for the City Tote Pattern Feb 8, 2015
    • Feb 5, 2015 Fabric, Pattern and Hardware Giveaway Feb 5, 2015
    • Feb 4, 2015 The City Tote Pattern Release Coming Soon Feb 4, 2015
    • Feb 3, 2015 Call for Pattern Testers FAQ’s Feb 3, 2015
  • January 2015
    • Jan 28, 2015 PATTERN TESTERS NEEDED Jan 28, 2015
    • Jan 12, 2015 Mailbag Crossbody Pattern Release coming Jan 15th, 2015 Jan 12, 2015

My Patterns:

Featured
Quinn Smartphone Wallet Wristlet - PDF Pattern - RLR Creations
$8.05
Julep Carry All Tote Bag - PDF Pattern - RLR Creations
$8.05
The Wayfarer II Bundle - includes Traveler Totes and Backpack patterns - PDF Pattern - RLR Creations
$14.00
The Wayfarer 2 Traveler Totes - 2 sizes included - PDF Pattern - RLR Creations
$8.05
The Wayfarer 2 Traveler Backpack -Full Size Backpack PDF Pattern - RLR Creations
$8.05
The Ballena Packing Pods Pattern - Ideal for organizing Diaper Bags, Backpacks, Travel Bags, and Gym Bags - PDF Pattern - RLR Creations
$8.05
Yara Double Compartment Crossbody Pattern - PDF Pattern - RLR Creations
$8.05
Tiffin Double Compartment Lunch Totes - Child and Adult sizes included - PDF Sewing Pattern
$8.05
Nova Sling Bag- PDF Sewing Pattern
$8.05
Helena Contemporary Hobo Bag - PDF Pattern - RLR Creations
$8.05