

The Zelie Clutch is a stylish modern bag that can be made to be casual or formal. The unique 3D shaped front gives lots of room for all of your essentials, along with a flat back to make it comfortable to carry with or without the optional strap. A flap closure held with 2 magnetic snaps keeps your things securely inside.
Zelie offers several pockets for organization including a front zipper pocket for easy access to the essentials, an interior zipper pocket and two interior slip pockets. Pattern includes both a detachable shoulder strap and a wristlet strap option to allow for hands-free carrying. Best of all the Zelie Clutch Pattern gives you two sizes to choose from.
Turn the Front Zipper Pocket into a safe place to keep your cards and cash and leave your wallet behind.

Just a few extra steps and you can create a front pocket that offers you the convenience of a built-in wallet to allow you more room on the interior for your daily essentials.
Let's get Started!
What you need:
Firstly, you will want to choose a zipper for your Exterior Front Pocket that is- 9” or longer for the small Zelie or a 10 or longer zipper for the large Zelie.
Second, you will want to omit cutting Piece B on the Additionally Cut list.
Instead you will cut-
1. Card Pocket Panel: CUT 1 Lining Fabric at 8” x 14”
2. Card Pocket Sides: CUT 2 Lining Fabric pieces at 1 ½” x 5 ¼” for Small Zelie or 2 ” x 5 ¼” for the Large Zelie
3. Pocket Lining Bottom: CUT 1 Lining Fabric at 9” x 3 ¾” or Small Zelie or 10” x 3 ¾” for the Large Zelie

Third, do not fuse the Light Interfacing to the Piece B-Zipper Pocket Facing. You need both of these pieces but do not fuse them together.

Making the Card Pocket-
**This will replace the Front Zipper Pocket directions starting on Pages 7 and 8 of the pattern.
Create the Card Slots:
1. Place the Card Pocket Panel piece WRONG SIDE UP with a long side facing you. Starting at one short edge, measure and mark 2 vertical lines as follows:
1. Line 1- Starting at one short edge measure and mark a vertical line 2 ½” up from the short edge.
*NOTE: this will be the bottom of your card pocket, so if you are using directional fabric be sure to start at the bottom short edge as you mark.
2. Line 2- Measure up 4 ¼” from Line 1 (or 6 ¾” from bottom) and mark another vertical line.

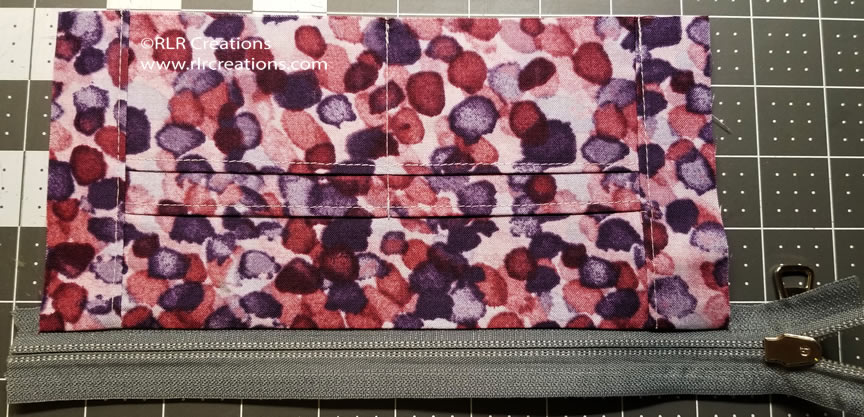
2. Starting at the bottom, fold the fabric along the two marked lines with WRONG SIDES TOGETHER and press to create a crease

3. With RIGHT SIDE UP fold the fabric at the first crease and topstitch across the piece, ¼” away from the fold. Fold the second crease and topstitch across ¼” away from the fold.

4. With the piece RIGHT SIDE UP, measure down ½” below the second crease and mark.

5. Next, measure up 3 ¾” above the second crease and mark.

6. With the RIGHT SIDE UP, starting at the bottom of the piece, pull the first topstitched edge towards the second topstitched edge so that it lies 1/2" under the folded edge above it, right against the mark you made. Press to flatten so the fold that happened on n the WRONG SIDE is creased.


7. Fold the second topstitched edge up until it lays on the line you drew 3 ¾” above. Press again to flatten so the fold that happened on the WRONG SIDE is creased.


Now you have two rows of card slots.

Next, we will divide the pocket to give you 4 card slots total.
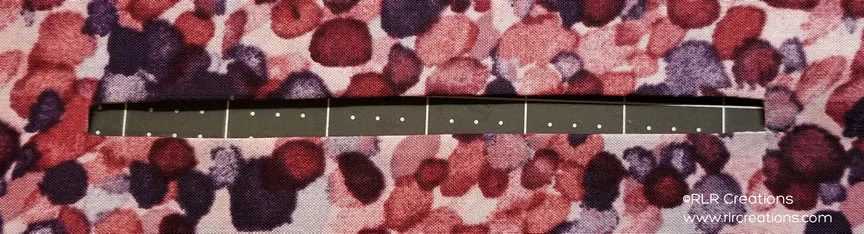
8. Measure and mark the center down the card pockets, and then topstitch down the center of the piece to divide the card pockets starting right above your top fold down to the bottom raw edge. Be sure to back stitch when you start and stop.

9. Trim your finished Card pocket piece from the top raw edge so that your finished piece now measures 5 ¼” by 8”.

Finish the Card Pocket Piece:
1. Align one of the long raw edges of the Card Pocket Sides along each side of the Card Pocket piece, RIGHT SIDES TOGETHER. Pin in place.

2. Stitch down the side with a ½” seam allowance.


3. Press the Card Pocket Side pieces away from the Card pocket with the seam allowance facing towards the Slip Pocket Piece.
4. Topstitch down each Card Pocket Side piece ⅛” away from the seam

The finished piece will now measure 9” wide x 5 ¼” tall for the Small Zellie or 10” wide x 5 ¼” tall for the Large Zelie
Add the Zipper-
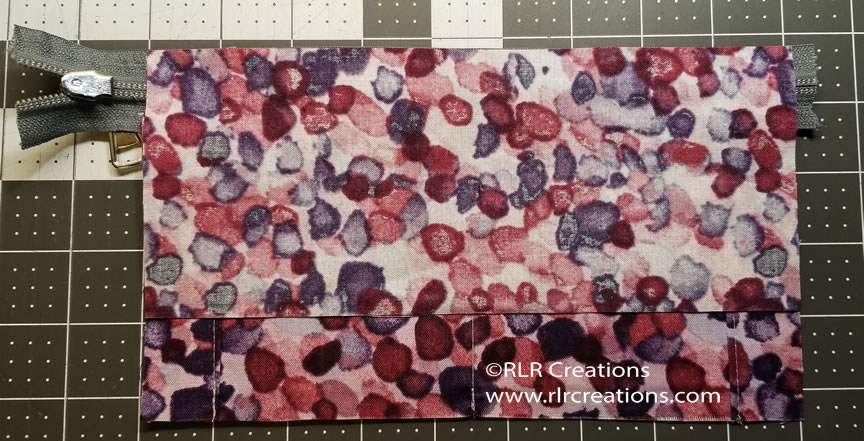
1. Place the Card Pocket piece you just completed RIGHT SIDE UP.
2. Next, place the zipper FACE UP on top of the Card Pocket piece and align the top edge of the zipper tape with the top raw edge of the Card Pocket piece. Pin in place.
The RIGHT SIDE of the Card Pocket piece should be facing the WRONG SIDE of the zipper.
*NOTE: Make sure that the zipper stop at the bottom of the tape goes past the end of the Pocket Lining pieces so that when you add your zipper to the zipper opening it will be out of the way when stitching.
If you want the zipper to open either right or left, be sure that the zipper pull faces that way when you add it to the Zipper Pocket Lining Top.
3. Stitch across with a ¼” seam allowance.

4. Fold the Card Pocket piece away from the zipper and press, being careful not to melt the zipper
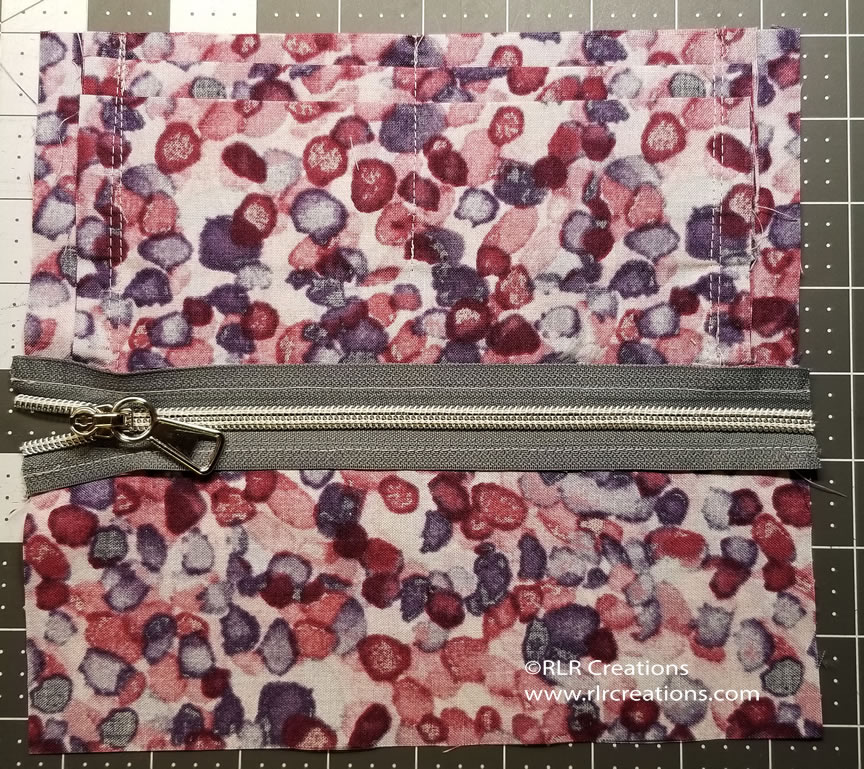
5. Place the piece RIGHT SIDE UP. Your Zipper will be face down and your card pockets face up.
6. Align the raw edge of the Pocket Bottom piece, WRONG SIDE UP, along top edge of the unsewn side of the zipper. Pin in place.
7. Stitch across with a ¼” seam allowance. Fold the Pocket Lining piece away from the zipper and press, being careful not to melt the zipper.

The finished piece will have the RIGHT SIDES of the Pocket Lining pieces on the back side of the zipper.
Set the finished zipper lining piece aside.
Zipper Pocket Facing:
1. Place the Zipper Pocket Facing (Piece B) piece, RIGHT SIDE UP, then align the interfacing Piece B piece on top with the fusible side facing up. You will want the non-fusible side of the interacing facing the RIGHT SIDE of the fabric piece. Pin in place.


2. On the Zipper Pocket Facing mark a line 1 ¼” down from the top (long) edge. Draw another line ⅜” under the first line or 1 ⅝” down from the top raw edge of the Zipper Pocket Facing.
3. Connect the two lines to mark a rectangle by measuring in 1” in from the sides and marking a vertical line on both sides.

*CHECK: You should have a centered rectangle measuring 7” by 3/8” for small Zelie or 8” x 3/8” for large Zelie
4. Stitch the rectangle lines you just drew through both layers with a stitch length of 2.5 (normal) on the long sides, then changing to a 1.0 stitch length on the short sides.

5. Draw a centered horizontal line down the center of the rectangle you just stitched. Measure ½” from both sides of the rectangle and draw a short vertical line on both sides. Form an arrow on each side as pictured.

6. Cut along the center line and all diagonal lines getting as close as possible to the corners without cutting through the stitches.

A small pair of pointy scissors are ideal to cut the diagonal lines to get as close to the stitches as you can. After cutting is completed you should have a triangle cut at each end.
7. Pull the Zipper Pocket Facing piece away from the Panel piece and crease well with your fingers to create creases where the seams are.

8. Pull all of the Zipper Pocket Facing piece through the rectangle opening you just created so it is now at the back of the Panel piece. Press the interfacing down so the Interfacing piece at the opening does not show on the front side of the Facing piece.

Adding the finished Zipper Piece:
1. Place the assembled Zipper pocket piece with the zipper RIGHT SIDE UP. Be sure that your zipper pull is inside the edges of the Zipper Pocket pieces.

I like to mark my piece to know where the side of the opening should lay when placed over the zipper by measuring in 1 inch in from the side edge of the zipper pocket piece.
2. Place the Zipper Pocket Facing piece on top of the zipper and center the zipper within the opening. Be sure that your zipper pull is inside the zipper opening. Pin in place

3. With the Panel RIGHT SIDE UP, stitch all the way around the rectangle with a ¼” seam allowance to enclose the zipper.

When you flip the piece over you will see that the tops of the Pocket Lining pieces are now topstitched and away from the zipper.

Now you are ready to proceed to page 9 in the pattern to complete your Zelie!

Card Cash pocket piece on the front of the finished Zelie Clutch

And who doesn’t like to protect their Valuables?! Check out the locking zipper pulls offered by So, You Need Hardware? Available in a convient kit with all the hardware you need to make your very own Zelie clutch with a Card/Cash pocket!
Hop over to http://soyouneedhardware.com/kits/rlr/ and find a complete kit for your Zelie Clutch and a locking zipper pull!!
Zelie Hardware kit: http://soyouneedhardware.com/zellie/
Zelie Hardware Kit with a Locking Zipper Pull: http://soyouneedhardware.com/zellie-option-2/


We would love to see your completed Zelie clutch. Share your photos with us in the RLR Creations Sewing group on Facebook and enter our monthly giveaway here: facebook.com/groups/RLRCreationsSewingPatterns