
Welcome to the first Installement of the RLR Creations “Pattern Spotlight”
I’m Tanya Summers, Creative Director at Little Mate’s Wardrobe and one of your friendly admin on the RLR Creations Sewing Patterns group. Over the next few months I will be showing you cool features of some of the RLR Creations patterns and giving you a few ideas on how to make your creations unique to you. This is where you will be able to come for inspiration and get some hot tips to help you create your very best!
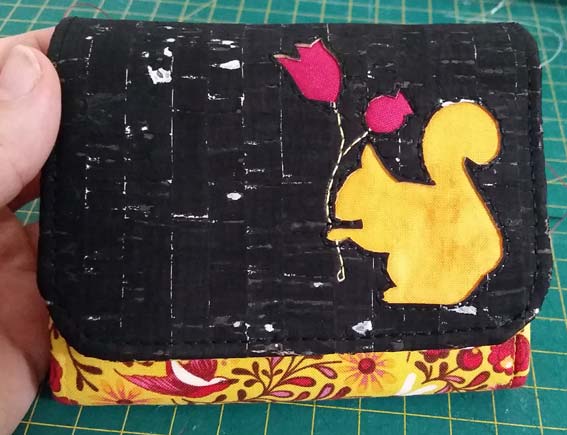
Photos and Limelight Wallets by Tanya Summers of Little Mate's Wardrobe
This month we will be focusing on the Limelight Wallet, which is available for purchase HERE or for Craftsy users you can find it HERE.
Each week, I will be showing you some sewn examples of different fabrics, ideas to create a magical one-off piece, and even give you a free, yes FREE, and easy paper piecing pattern specifically designed for the Limelight Wallet. Along the way, I will show you some tips and tricks to help you perfectly place your fabric on the flap, add piping to give it a pop of color and much, much more.
So let’s get started…


Week 1 – Getting inspired by your favourite designer to create a memorable flap design!
As the Limelight Wallet has a large flap (in proportion to its overall size) this is the ideal spot to make a creative impact! For my first example I have used ‘reverse appliqué’ to create a design on my first example. I have used cork because, like leather, it is resistant to fraying which is important when we cut a raw edge for things such as appliqué.
My theme for this wallet was Tula Pink, one of my favourite fabric designers, largely due to her fabulous and creative use of animals in her designs.
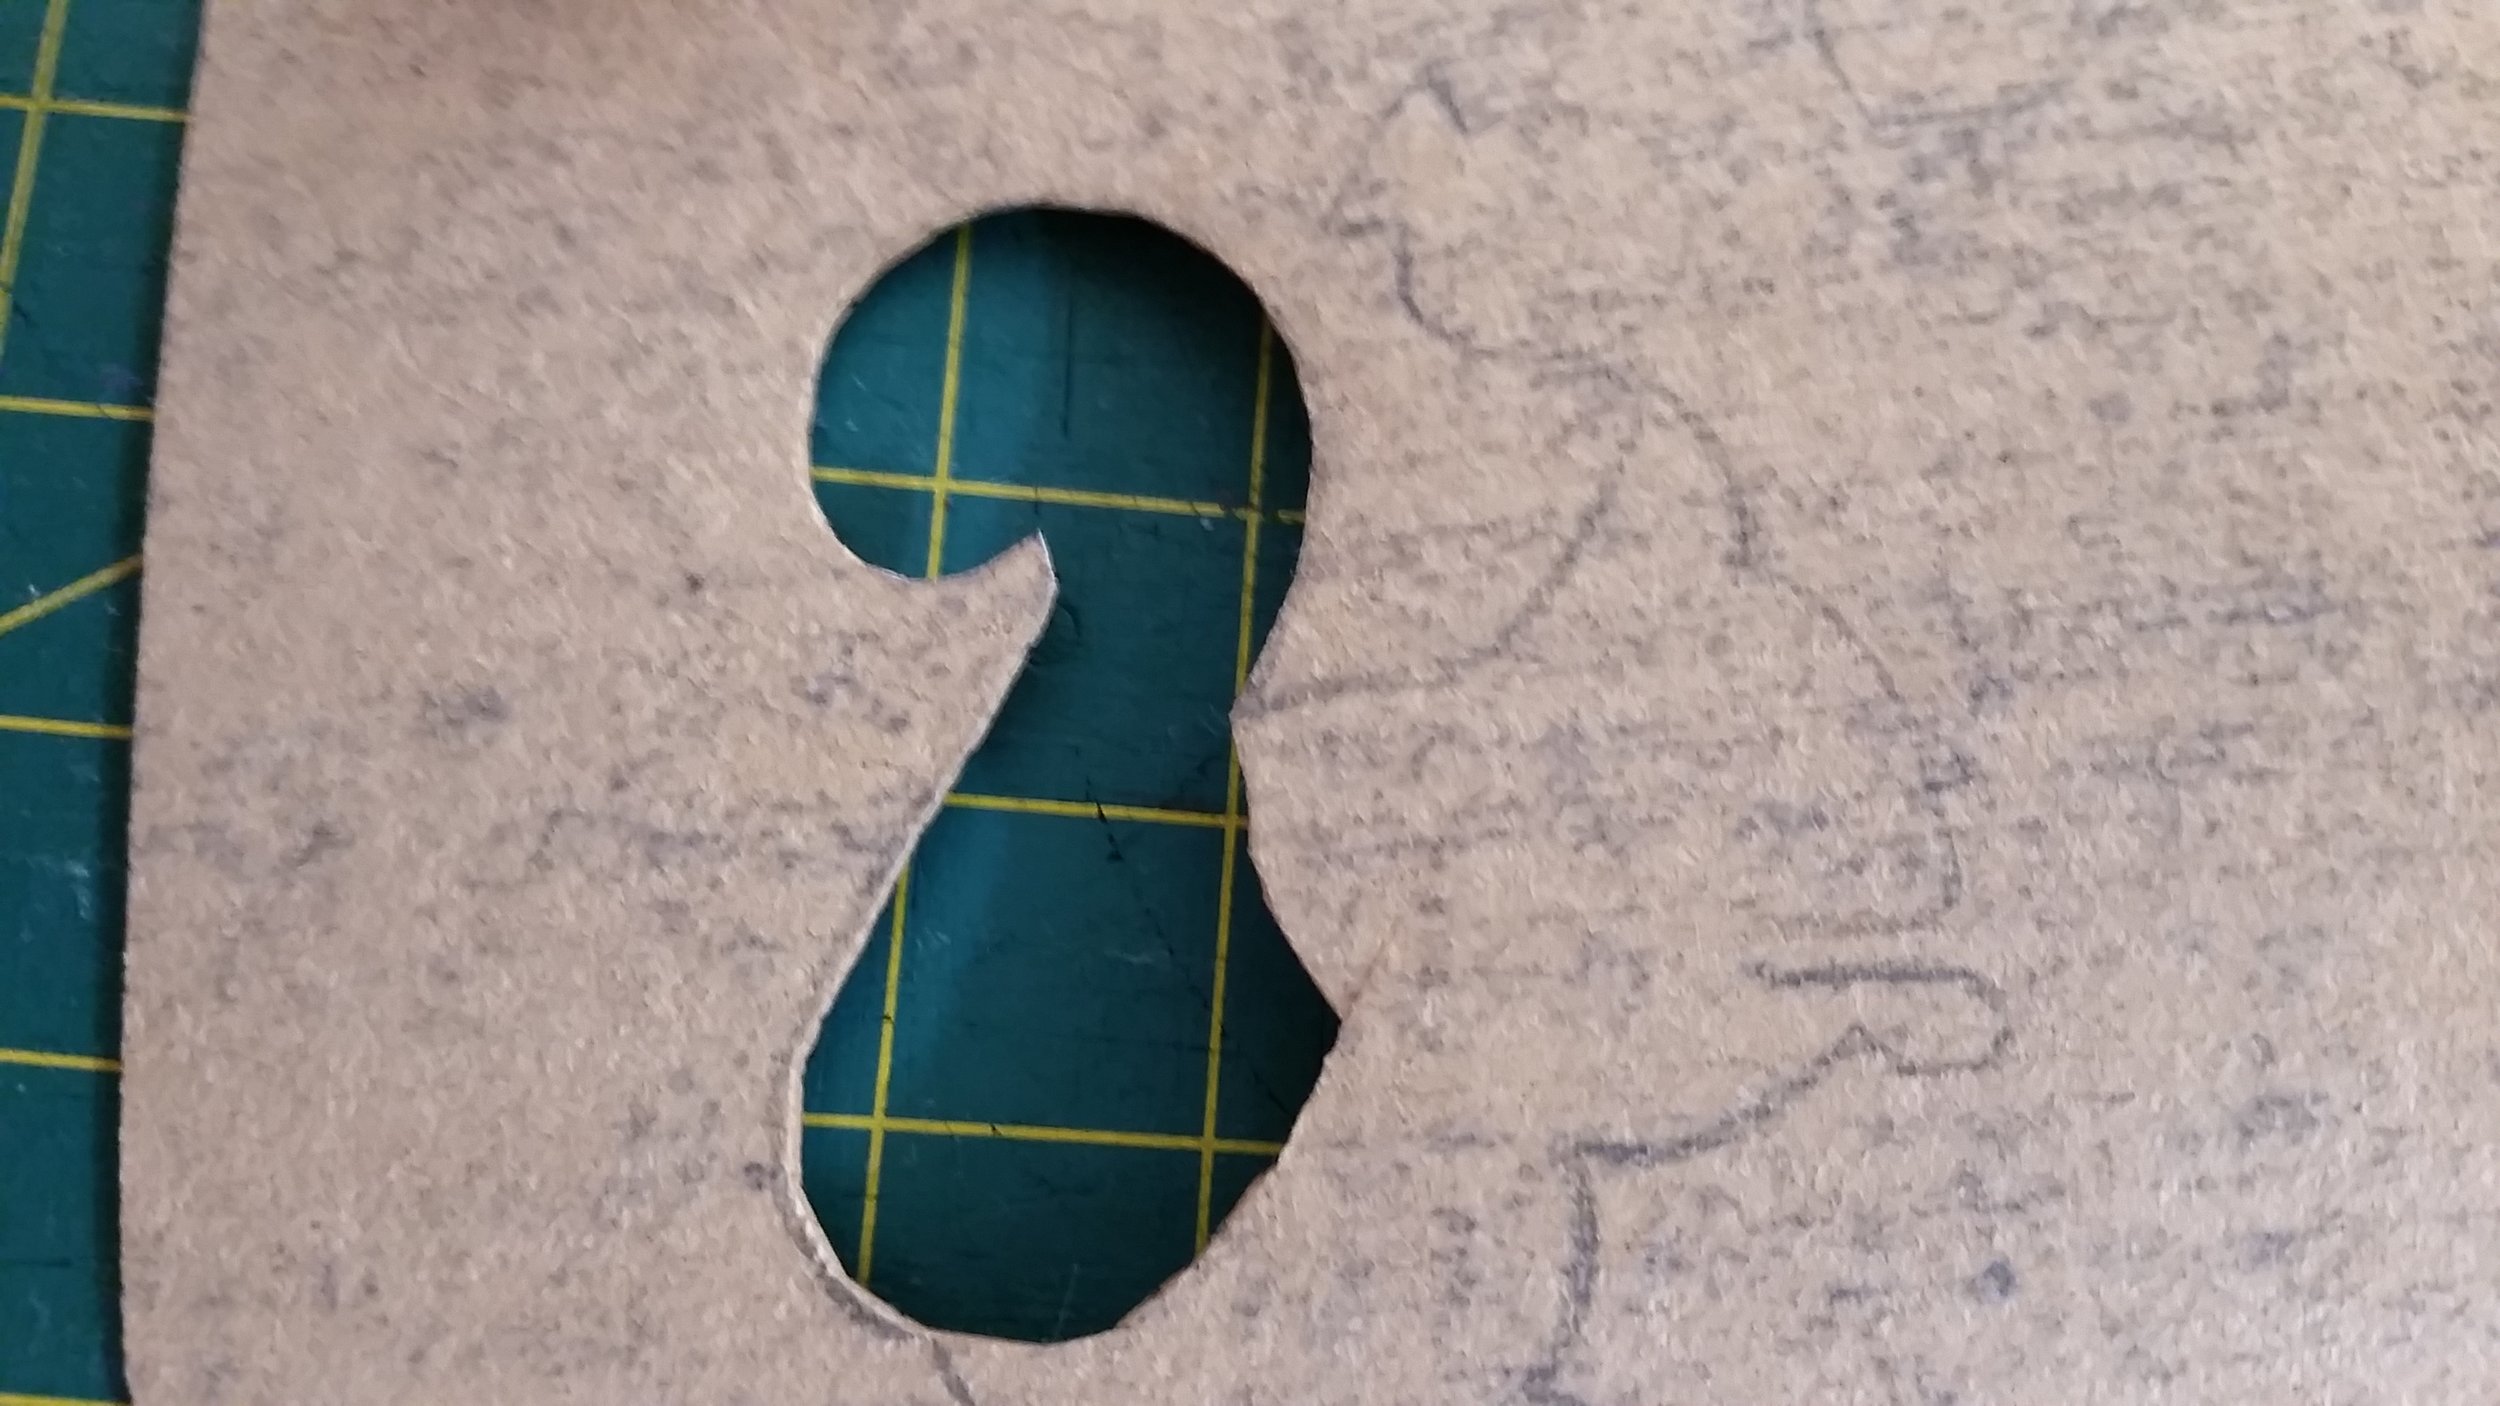
A Quick Guide to Reverse Applique
Draw your design on some tracing paper, then turn it over and transfer it on the back of your cork/leather. I like to use lead pencil for this.

Now that your design is clearly copied onto the reverse, you can start to cut very carefully along the line.
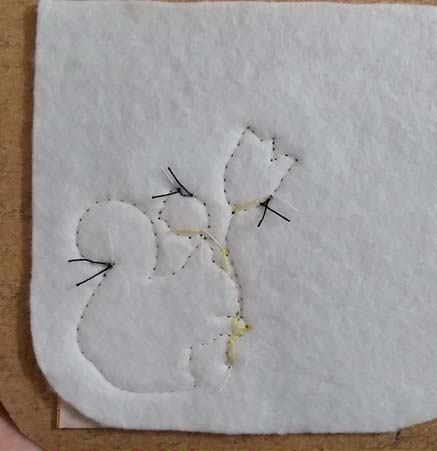
Pick your fabric colors for under the cutout and then cut out small pieces large enough to cover the hole with enough room to stitch around the outside.

Once you have stitched around each shape you can then add other stitches to join the shapes together, in my case adding the stems for the flowers.

Now that your Exterior Flap piece is complete, continue to create your flap as per the Limelight instructions.
Week 1: Bonus Add-on: Double Card Pockets
Who doesn't love more card Pockets? The creative Tanya Summers has added a double row of card pockets to the Limelight wallet to give you even more space to store all of your cards. Follow along as she shows you how simple this is to do!
My card pockets on this wallet vary from the main pattern. I have added a set of 3 card pockets to the inside front of the wallet, in addition to the 3 on the inside back and the hidden pocket behind the card pockets at the back.

Rather than cut the Piece C Card Pocket Panel that is included in the pattern you will need to cut these two pieces:
The cutting list for the new card pockets is:
- Card Pocket A – 18 ¾” x 4 ⅞”, cut 1 Lining Fabric and 1 Interfacing
- Card Pocket B – 15 1/4 “ x 4 ⅞”, cut 1 Lining Fabric and 1 Interfacing
Fuse the interfacing to the wrong side of the Fabric Pieces then create your folds as follow:
Card Pocket A:
Measure down from the top of the fabric piece in the following increments:
4”, 2 ¼”, 1 ¾”, 2 ¼”, 1 ¾”, 2 ¼”, 1 ¾”, 2 ¾”.
Fold the first line, from the top, wrong sides together, the second line right sides together, the third fold wrong sides together and so on, until all the lines are folded. Topstitch the tops of all the folds as directed on Page 13, step 2 in the pattern.
Now, with your Card Pocket A right side up, fold the topstitched edges up, towards the top of the Card Panel until you have created 3 card pockets. The top card pocket top will sit evenly on top of your last top stitched line. Pin in place along the sides.
Card Pocket B:
Measure down from the top of the fabric piece in the following increments:
½”, 2 ¼”, 1 ¾”, 2 ¼”, 1 ¾”, 2 ¼”, 1 ¾”, 2 ¾”.
Fold the first line wrong sides together, the second line right sides together, the third fold wrong sides together and so on, until all the lines are folded. DO NOT topstitch the top fold (with the ½” folded behind, but DO topstitch the tops of folds 2, 3, 4.).
Now, with your Card Pocket B right side up, fold the topstitched edges up, towards the top of the Card Panel until you have created 3 card pockets. The top 1/2", that you did not topstitch will be folded wrong sides together and will create the bottom of your pocket.
Join the bottoms of Card Pockets A and Card Pocket B together with a ½” seam. CHECK that your card piece fits nicely along Main Piece A (See page 15/16 of the instructions for the location). It should be 7 ½” long. If your piece fits well, iron the middle seam flat and topstitch on either side of the seam. Baste down both long sides as close to the edge as possible. Continue from Page 16, step 3, topstitching to the Main Panel Piece A.
And that’s it!! Everything else is finished as per the pattern. Please share your creations on https://www.facebook.com/groups/RLRCreationsSewingPatterns/. I would love to see what reverse applique, traditional applique or other great ideas you have for your Limelight Wallet.
Next week, I will be discussing Fussy Cutting (how to get your pictures centred perfectly on the front flap) and how to add a wrist strap!
If you would like to learn more about the extremely talented Tanya Summers and see the amazing things she creates hop over to her facebook page at Little Mate's Wardrobe and take a moment to view her fabulous bags at her Etsy Store HERE!